How To Make The Protein Shake
A practical step-by-step guide to how to make the protein shake, including preparation, instructions, common issues, tips, and next steps.
How To Make The Protein Shake
Learning how to make the protein shake correctly is the key to unlocking its benefits, whether you're recovering from a workout, replacing a meal, or supplementing your diet. This guide provides clear, step-by-step instructions for creating a smooth, delicious, and effective protein shake every time. We'll cover both the quick shaker-bottle method for on-the-go needs and the versatile blender method for creating a more substantial smoothie, ensuring you can avoid common pitfalls like clumps and a chalky taste.
Fast Answer
- The Golden Rule: Always add your liquid to the shaker or blender before adding the protein powder.
- For a Shaker: Add liquid, then powder. Secure the lid and shake vigorously for 20-30 seconds.
- For a Blender: Add liquid, then powder and other ingredients. Blend for 30-60 seconds until smooth.
Before You Start
Proper preparation is the difference between a gritty, unpleasant drink and a smooth, satisfying shake. Gather your tools and ingredients, and run through these quick checks to ensure you get the best possible result.
What You Need
- Protein Powder: The core ingredient. This can be whey, casein, soy, pea, hemp, or another type of protein supplement.
- Liquid Base: Typically 8 to 12 ounces per scoop of powder. Options include cold water, dairy milk (whole, 2%, skim), or plant-based milks like almond, soy, oat, or coconut milk.
- A Mixing Vessel: A shaker bottle with a mixing ball or screen is essential for a quick shake. A blender (countertop or personal size) is necessary if you plan to add solid ingredients like fruit or ice.
- Measuring Tools: The scoop that comes with your protein powder and liquid measuring cups if you want to be precise.
- Optional Add-ins: Ingredients to enhance flavor, texture, and nutritional value, such as fruits (banana, berries), vegetables (spinach), healthy fats (nut butter, chia seeds), and flavorings (cocoa powder, cinnamon).
Safety, Timing, and Context Checks
- Check Your Powder: Always check the expiration date on your protein container. Also, carefully read the ingredients list for potential allergens like dairy, soy, nuts, or gluten, especially if you have sensitivities.
- Consider the Timing: The best time to drink your shake depends on your goals. For muscle recovery, consuming a shake within 30 to 60 minutes after a workout is often recommended. As a meal replacement, it can be consumed anytime. As a supplement, it can help you meet daily protein targets between meals.
- Cleanliness is Key: Ensure your shaker bottle or blender is clean before you start. Old residue can not only affect the taste but also harbor bacteria. Plan to clean your equipment immediately after use.
Step-by-Step Instructions
Follow these steps to create a perfect protein shake. We'll cover the basic method with a shaker bottle and then expand on it for a more complex blender-based smoothie.
Step 1: Choose Your Method and Liquid Base
First, decide if you're using a shaker bottle or a blender. A shaker bottle is perfect for a simple, fast shake with just powder and liquid. It's portable and easy to clean. A blender is the better choice if you want a thicker, smoother texture or want to add ingredients like frozen fruit, oats, or nut butter.
Next, select your liquid. Water is a zero-calorie option that lets the flavor of the protein powder shine through. Dairy milk adds creaminess, calcium, and extra protein. Plant-based milks like almond or oat milk are great dairy-free alternatives that can also add subtle flavor and a creamy texture.
Step 2: Add the Liquid to Your Vessel First
This is the most critical step for avoiding clumps. Pour your chosen liquid into the shaker bottle or blender before anything else. A standard starting point is 8 to 12 ounces (240-350 ml) of liquid. Using less liquid will result in a thicker shake, while more liquid will create a thinner consistency.
Adding the liquid first prevents the powder from getting stuck in the corners at the bottom of the container, where it's hard for the mixing ball or blender blades to reach. This creates a buffer zone that allows the powder to dissolve freely.
Step 3: Measure and Add the Protein Powder
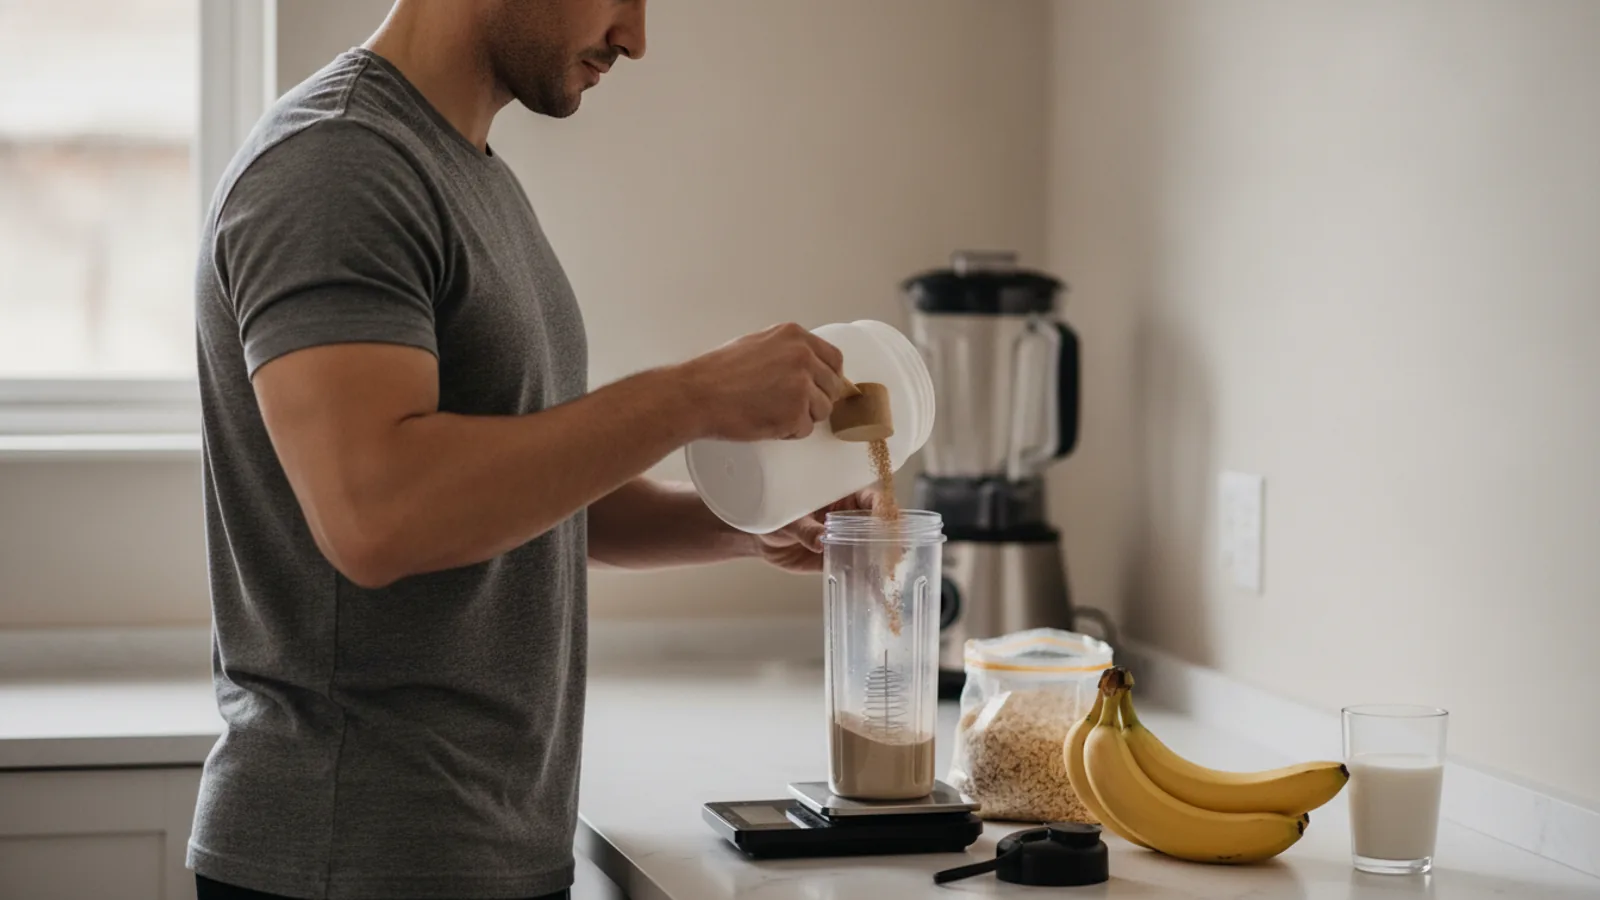
Use the scoop provided with your protein supplement. For accurate measurement, level off the scoop with a knife or a flat edge. Add one serving (typically one scoop) of protein powder on top of the liquid in your shaker or blender.
Do not pack the powder into the scoop, as this can give you more protein—and calories—than you intend. A loose, level scoop is the standard serving size referenced in the nutritional information on the label.
Step 4: Include Optional Add-Ins (Blender Method)
If you're using a blender, now is the time to get creative and boost the nutritional value of your shake. For the best blending results, add ingredients in this order: liquids first, then powders, followed by soft ingredients like spinach or yogurt, and finally hard or frozen ingredients like ice or frozen fruit on top.
- For Creaminess: Add half a banana (frozen is even better), a tablespoon of chia seeds, or a scoop of Greek yogurt.
- For Healthy Fats: Include a tablespoon of almond butter, peanut butter, or a quarter of an avocado.
- For Fiber and Carbs: Add a handful of spinach (you won't taste it), or a 1/4 cup of rolled oats.
- For Flavor: A teaspoon of unsweetened cocoa powder, a dash of cinnamon, or a drop of vanilla extract can transform a bland shake.
- For a Thicker, Colder Shake: Add 4-6 ice cubes or use frozen fruit instead of fresh.
Step 5: Secure the Lid and Mix Thoroughly
Proper mixing is essential. Ensure the lid of your shaker bottle or blender is completely sealed to prevent leaks. A loose lid can lead to a messy kitchen.
For a Shaker Bottle: Make sure the flip cap is snapped shut. Grip the bottle firmly and shake vigorously up and down for about 20 to 30 seconds. The mixing ball or screen will do the work of breaking up the powder. You should hear it rattling around as it works.
For a Blender: Secure the lid and start blending on a low setting for about 10 seconds to combine the ingredients, then increase the speed to high and blend for another 30 to 60 seconds, or until the mixture is completely smooth and free of chunks.
Step 6: Check Consistency and Perform a Taste Test
Once you've finished mixing, open the lid and check the shake's consistency. Is it too thick or too thin for your liking? Give it a quick taste. Sometimes, the flavor can be adjusted to make it more enjoyable.
- If it's too thick: Add a little more liquid (an ounce at a time) and shake or blend again for a few seconds.
- If it's too thin: You can add a few ice cubes, a small amount of frozen banana, or a teaspoon of chia seeds (let it sit for a minute to thicken) and re-blend.
- If it's not sweet enough: Add a small amount of a natural sweetener like a teaspoon of honey, maple syrup, or a whole date and blend again.
Step 7: Clean Your Equipment Immediately
This step might seem optional, but it's crucial for maintenance and hygiene. Protein residue, especially from dairy-based powders, can quickly dry into a cement-like substance and develop unpleasant odors. As soon as you finish your shake, rinse the shaker bottle or blender pitcher with warm water.
For a deeper clean, add a drop of dish soap and some warm water, close the lid, and shake or blend for 10 seconds. Then, rinse thoroughly. This simple habit will keep your equipment fresh and ready for your next shake.
Quick Reference
| Situation | Use this | Why |
|---|---|---|
| Shake is clumpy | Add liquid before powder | Prevents powder from getting trapped and caking at the bottom. |
| Want a thicker shake | Frozen banana, chia seeds, or Greek yogurt | These ingredients add natural viscosity, fiber, and creaminess. |
| Need more calories for bulking | 1-2 tbsp nut butter or 1/4 cup oats | Adds calorie-dense healthy fats and complex carbohydrates. |
| Flavor is too sweet | A pinch of salt or a squeeze of lemon juice | Salt and acid cut through excessive sweetness and balance the overall flavor. |
| Want a post-workout boost | Whey protein + a high-carb fruit like a banana | Whey is fast-absorbing for muscle repair, and the fruit helps replenish energy stores. |
Common Problems When You Make The Protein Shake
Even with a simple process, a few things can go wrong. Here are some common issues and how to fix them for a better experience.
Problem: My shake is full of clumps.
This is the most frequent complaint. The primary cause is adding the powder before the liquid. To fix this, always follow the liquid-first rule. If you've already made a clumpy shake, try adding one or two ice cubes and shaking it again vigorously; the solid cubes act as an extra agitator to break up the clumps. Using a blender is the ultimate solution for a guaranteed smooth texture.
Problem: The texture is chalky or gritty.
A chalky texture often comes down to the quality of the protein powder itself or not using enough liquid. Some plant-based proteins are naturally more gritty than whey. Try adding more liquid to dilute the shake. You can also improve the texture by adding creamy ingredients like a small amount of avocado, a frozen banana, or cashew butter when using a blender. Letting the powder "bloom" or dissolve in the liquid for a minute before shaking can also help.
Problem: My shake is too thick or too thin.
Consistency is a matter of personal preference and is easily adjusted. If your shake is like sludge, simply add more of your liquid base, an ounce at a time, until it reaches your desired thinness. If it's watery, the fix depends on your equipment. In a blender, add thickening agents like ice, frozen fruit, oats, or a teaspoon of psyllium husk. In a shaker bottle, adding more powder can work, but it also increases the protein and calories; it's often better to start with less liquid next time.
Problem: My shaker bottle has a permanent bad smell.
This happens when bottles aren't cleaned promptly. To deep clean a smelly shaker, fill it with a mixture of equal parts white vinegar and water, let it sit for a few hours (or overnight), and then wash thoroughly with hot, soapy water. Alternatively, a paste of baking soda and water can be used to scrub the inside to neutralize odors.
Advanced Tips for The Protein Shake
Ready to move beyond the basics? These tips will help you optimize your shakes for taste, nutrition, and convenience.
Master the Blender Loading Order
For the smoothest possible blend, load your blender strategically. The correct order helps the blades work efficiently and prevents cavitation (air pockets forming around the blade). The optimal order is:
1. Liquids: Water, milk, etc.
2. Powders & Soft Ingredients: Protein powder, spinach, yogurt, nut butters.
3. Hard & Frozen Ingredients: Ice cubes, frozen fruit, whole nuts.
Prepare "Shake Packs" for the Week
Save time on busy mornings by prepping your dry ingredients in advance. In small zip-top bags or containers, portion out a scoop of protein powder, a tablespoon of chia seeds, a scoop of powdered peanut butter, or any other dry add-ins you use. When you're ready for a shake, just dump the contents of one pack into your blender with your liquid and blend.
Use Natural Thickeners
If you dislike the thin consistency of a basic shake but don't want to add a lot of calories, use natural, low-calorie thickeners. A tablespoon of chia seeds or ground flax seeds will absorb liquid and create a thicker, more gel-like consistency if you let the shake sit for 5-10 minutes. For an instant fix in a blender, a very small pinch (less than 1/8 teaspoon) of xanthan gum will add significant thickness without affecting flavor.
Pair Protein Type With Your Goal
Different proteins absorb at different rates. While any shake is beneficial, you can tailor your choice to your timing.
Post-Workout: Use a fast-digesting protein like whey isolate to quickly deliver amino acids to your muscles for repair.
Before Bed: A slow-digesting protein like casein can provide a sustained release of amino acids overnight, which may help reduce muscle breakdown while you sleep.
Meal Replacement: A blended protein (containing whey, casein, and/or egg) or a high-fiber plant-based protein can promote satiety and keep you feeling full longer.
How To Make The Protein Shake FAQ
Can I make a protein shake ahead of time?
What is the best liquid to use for a protein shake?
Is it okay to mix protein powder with hot liquids?
How much protein powder should I use?
Final Checklist for The Protein Shake
Run through this quick checklist every time you make a shake to ensure perfect results, safety, and easy cleanup.
- Check Your Powder: Is it within its expiration date? Are you aware of any allergens?
- Choose Your Method: Shaker bottle for speed or blender for versatility?
- Liquid First: Have you added 8-12 ounces of cold liquid to the vessel?
- Powder Second: Did you add a level scoop of protein powder on top of the liquid?
- Lid Secured: Is the lid on your shaker or blender completely tight?
- Mix Well: Have you shaken for at least 20 seconds or blended for 30-60 seconds?
- Taste and Adjust: Is the consistency and flavor to your liking?
- Clean Immediately: Did you rinse and wash your equipment right after finishing?